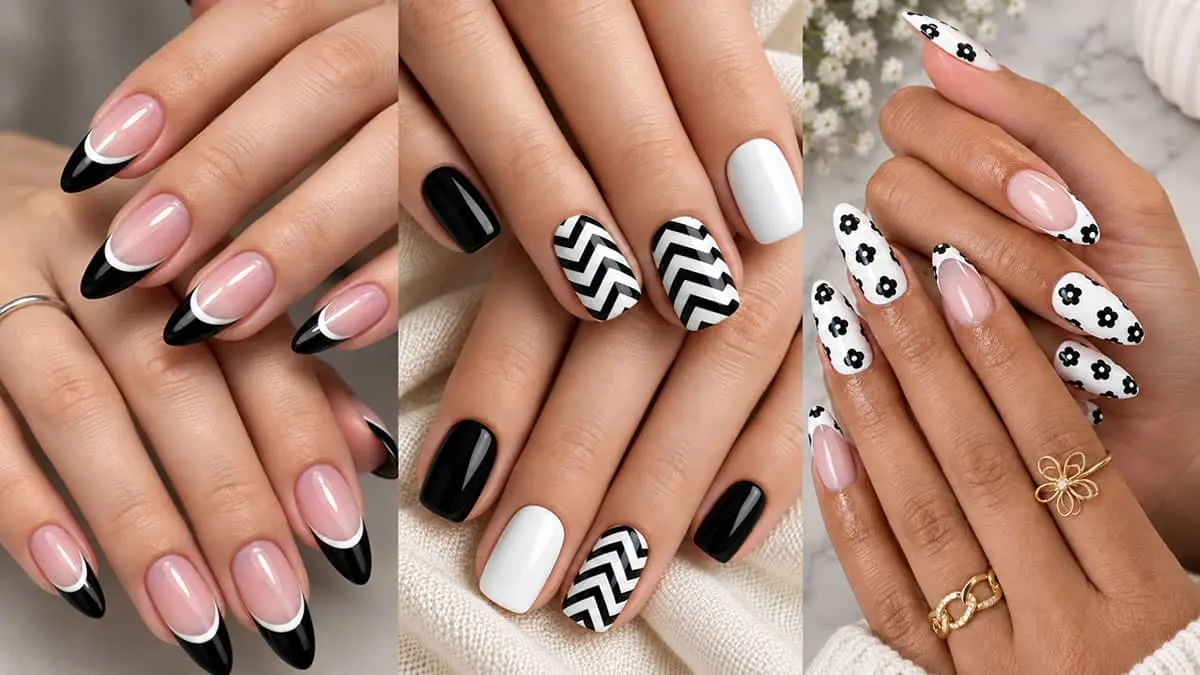
14 Best Black And White Nails Designs
Black and White Nails Designs use stark contrast to turn simple details into a focal point. A white base with a slender black line can make a statement without covering every nail. These 14 ideas show how placement changes a manicure’s character.
The balance matters as much as the artwork. Dense graphic designs create a different impression from airy florals, even within the same color combination. For casual daytime looks, leave breathing room around each motif; for formal evening events, consider repeating one detail across the set.
Before your next appointment, notice which details appeal to you: crisp lines, a wandering white squiggle, or deliberately uneven shapes. Those choices give classic techniques enough room to feel personal and wearable year-round.
The 14 Best Black And White Nails Designs
1. Classic French Tips with a Black and White Twist
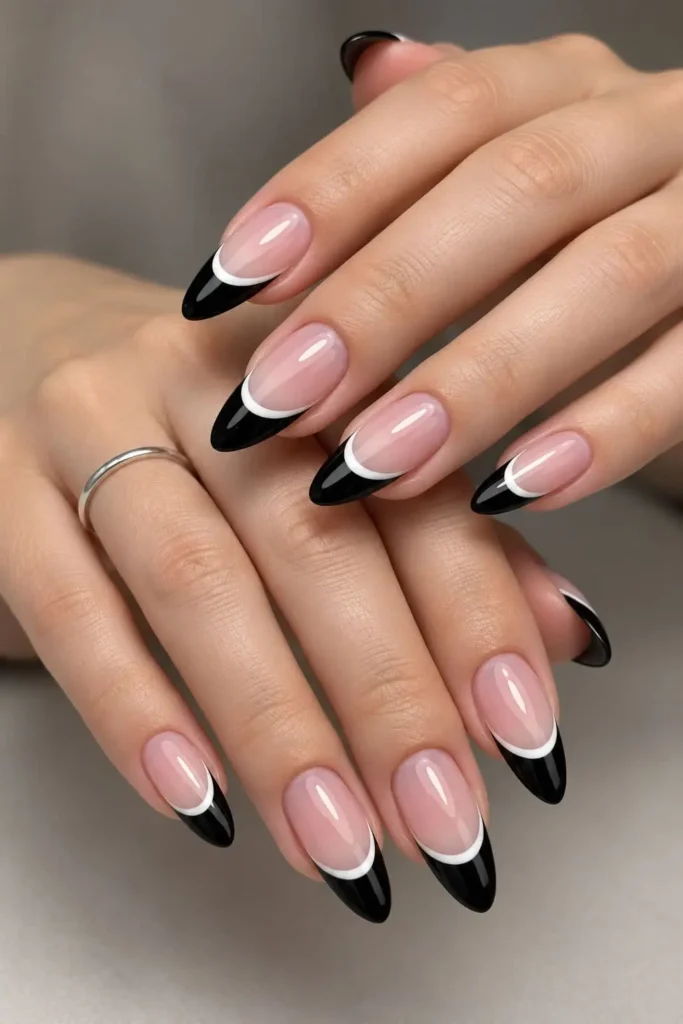
The most effective French-inspired manicure keeps the contrast concentrated at the edge. Pair a white base with narrow black tips, letting the tip shape follow each nail’s natural curved edge. I’d keep the border slim, so these high-contrast colors feel deliberate rather than heavy.
For precision, a French tip guide helps establish a clean line, especially when painting your dominant hand. If working freehand, rotate the finger instead of twisting the brush. Careful application matters more than extra decoration: correct slight wobbles before sealing the design for a polished finish.
2. Abstract Line Art for Modern, Artistic Nails
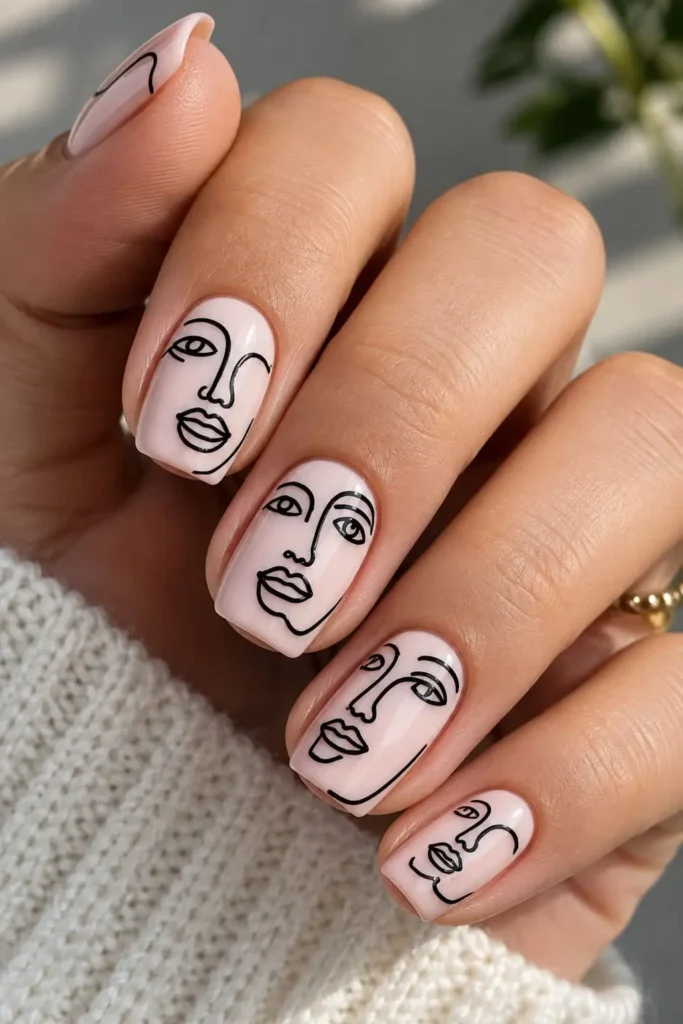
A sophisticated manicure can begin with deliberate unevenness: abstract line art leaves room for imperfections when spacing looks considered. Among black and white nail designs, single curved lines over a white base deliver high contrast appeal without complex decoration. Reserve multi-layered patterns for one accent nail.
For detailed linework, use a fine detail brush to paint small arcs; a long-bristled nail art brush suits sweeping swirls. Standard polish brushes can feel too wide, leaving edges imprecise. Apply a solid base color first, then introduce a dotting tool only where small dots complement the curves.
Trying nail art for the first time? Keep freeform designs simple, pairing freeform curved lines with open space instead of crowded geometric patterns. Creative freedom needn’t mean abandoning execution quality: distinguish intentional artistic choices from accidental smudges. Repeated spacing connects your artistic choices without requiring symmetrical patterns.
3. Geometric Patterns
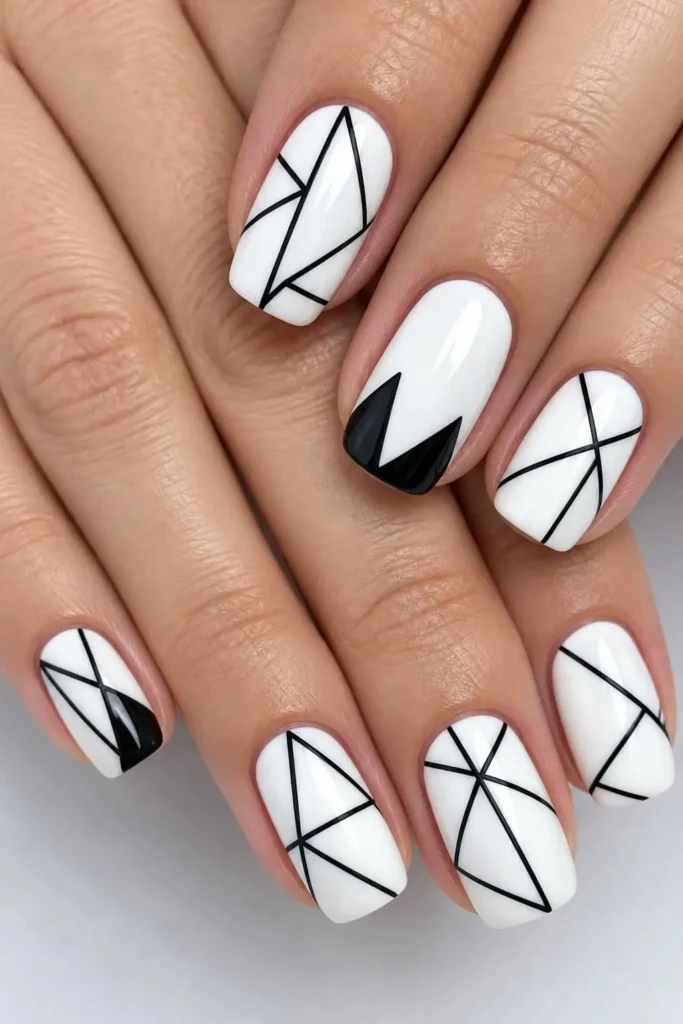
A convincing manicure does not need every nail filled. Offset triangles beside bare space give black and white room to register, while angular shapes can guide attention along the nail. Keep their scale consistent; competing focal points can weaken the overall design before technique becomes the issue.
For checkerboard patterns, establish even squares before adding extra detail. Pre-cut nail vinyl can help repeat proportions, while nail art tape suits narrow stripes. Place guides over a fully dry base so lifting them does not disturb the colour underneath or compromise those sharp, defined edges.
An abstract arrangement gives minor imperfections somewhere to belong, especially when freehand accents interrupt rigid repetition. Reserve geometric precision for the most visible boundaries. Consider natural wear when placing dark blocks near the tips, where minor chipping may become a distracting part of the finished pattern.
4. Marble Effect for Elegance
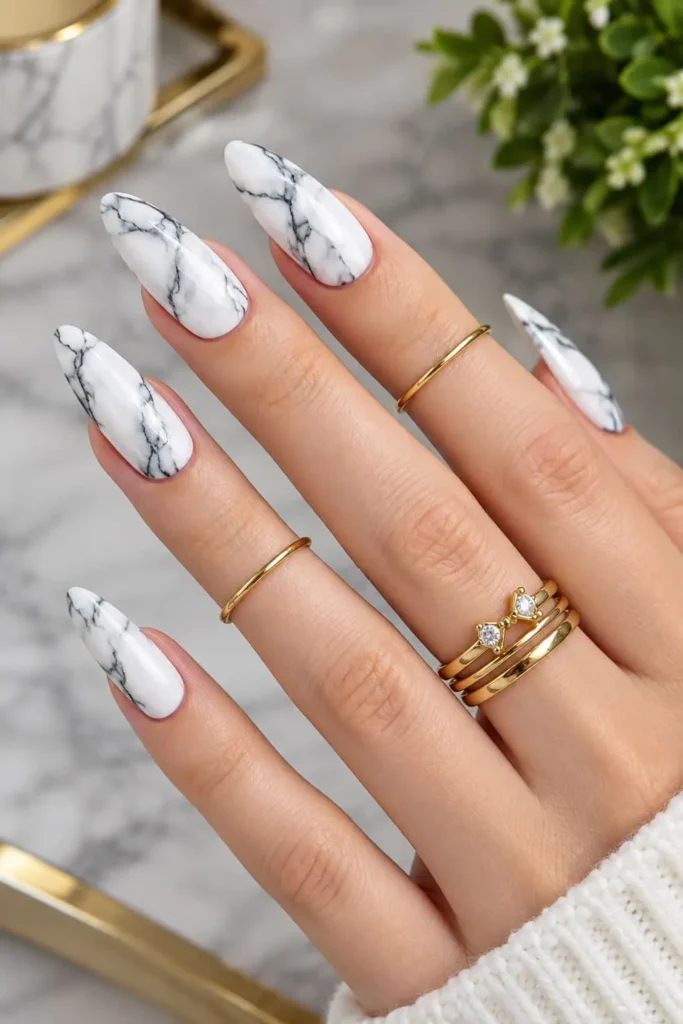
Convincing marble nail art needs breathing room: dense veined patterns can hide the white base that gives them definition. For an elegant, organic look, let natural stone veining guide an uneven marble pattern, with one stronger branch and several softer threads rather than evenly spaced stripes.
Try a thin brush before a toothpick when manipulating the polish for the first time. Over a dry base, brush on clear polish before applying black polish sparingly. While both remain wet and workable, light dragging through the wet black polish creates a fluid marbling effect.
Treat marble effect designs as small compositions, finishing one nail at a time instead of rushing across all ten nails. Too many passes can blend delicate branches into a smudge. Allow sufficient drying time before adding top coat to lock in the design without disturbing the detail.
5. Polka Dots for Playful, Timeless Charm
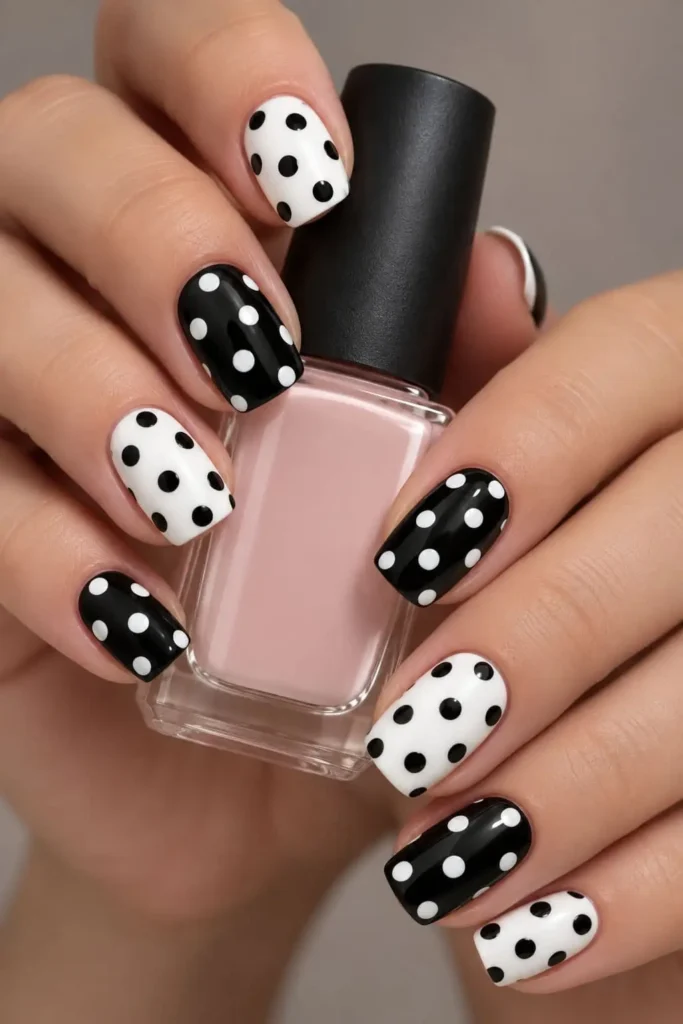
Smaller marks near the cuticle can make black and white polka dot nails feel surprisingly restrained. Keep varying dot size concentrated toward the tips for visual interest without crowding the base. A dotting tool offers more control when placing each mark on a contrasting background.
For polka-dot tips, borrow the curved outline of a classic French manicure, then leave tiny gaps between dots. Reload lightly for consistent dots; excess polish spreads into neighboring marks. This forgiving approach keeps the finish playful, while careful spacing gives even a simple layout precision.
6. Negative Space Designs for Modern Minimalism
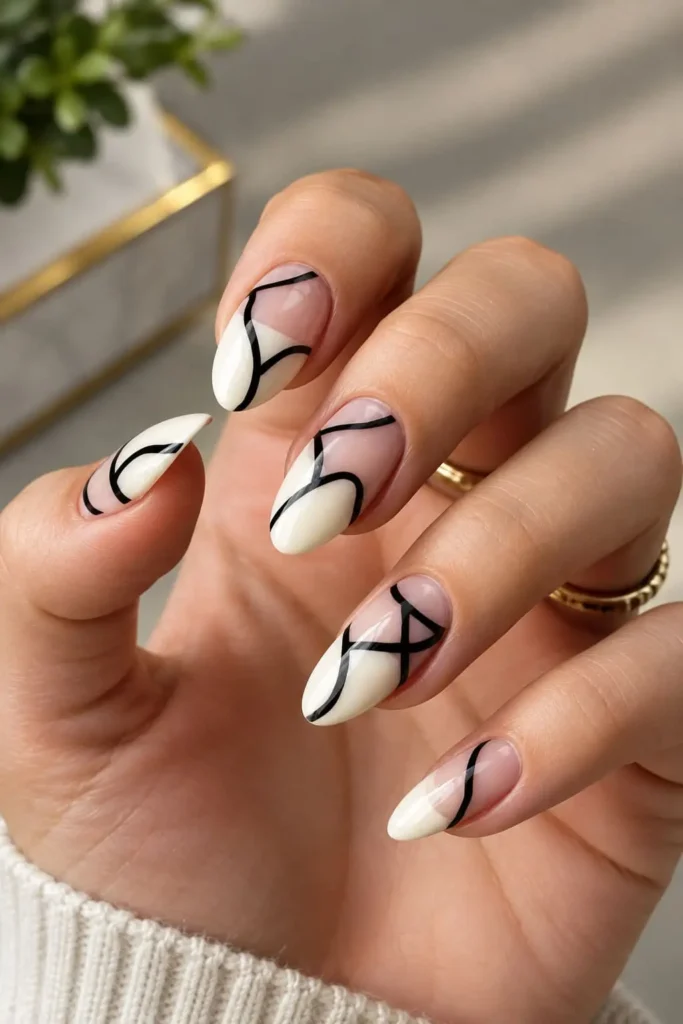
The most deliberate negative space designs often leave the largest area untouched. A triangular section of bare nail, framed with black and white polish, gives the pattern room to breathe. Place the darker shape along one side of the nail for an intentionally uneven balance.
Good application planning begins with the gaps. Sketch each boundary before painting, keeping unpolished sections wide enough to remain visible. A thin white line adds definition, but clean edges matter more than matching every finger; repeat the angle while varying the polished areas.
Keep the natural nail visible beneath a clear base, or choose a sheer neutral tint to soften uneven coloration. Apply a high-quality top coat for a glossy finish across the surface, including bare sections, without flooding the cuticle or dragging wet black pigment.
7. Black and White Nail Designs for Short Nails
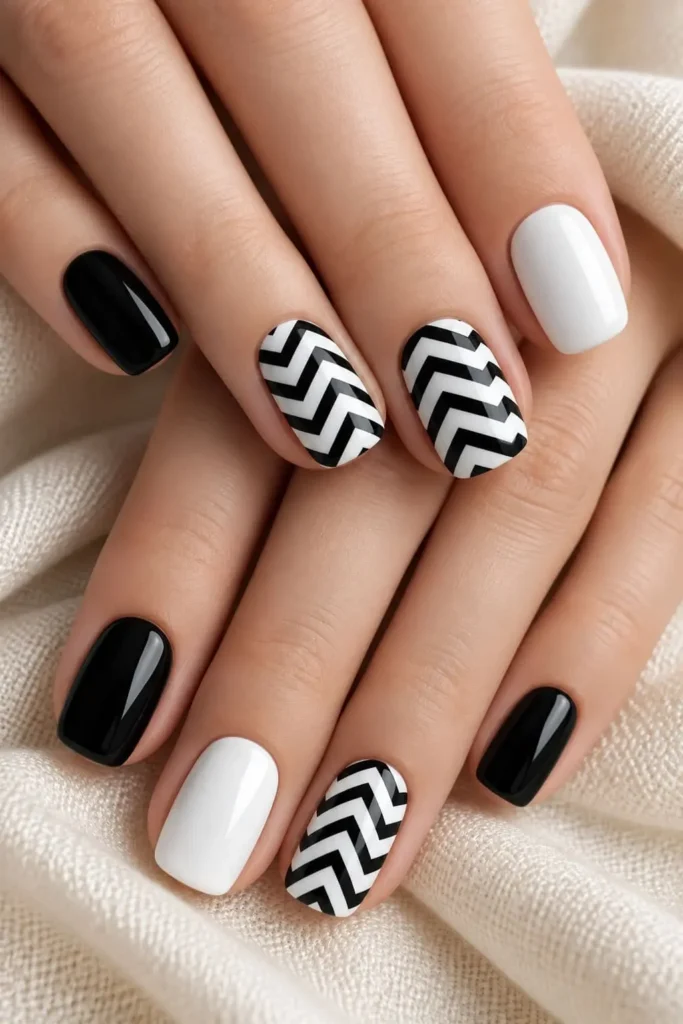
On short nails, contrast can do more than decoration. I’d choose a white base with solid black accent nails when the available surface area feels limited. Keeping the strongest contrast on one or two nails per hand gives the manicure a deliberate rhythm.
A black French tip needs restraint on shorter nails: keep the band narrow enough that it doesn’t dominate the entire nail. Pair it with clean geometric lines rather than several competing patterns. This approach makes black-and-white nail designs feel intentional up close.
For simple bold designs, I’d judge spacing before adding another mark. A detailed design can look cramped when every edge has decoration, and overlapping strokes can look muddled. Leaving visible white around a motif creates a cleaner boundary and makes the contrast more impactful.
8. Best for Long or Acrylic Nails
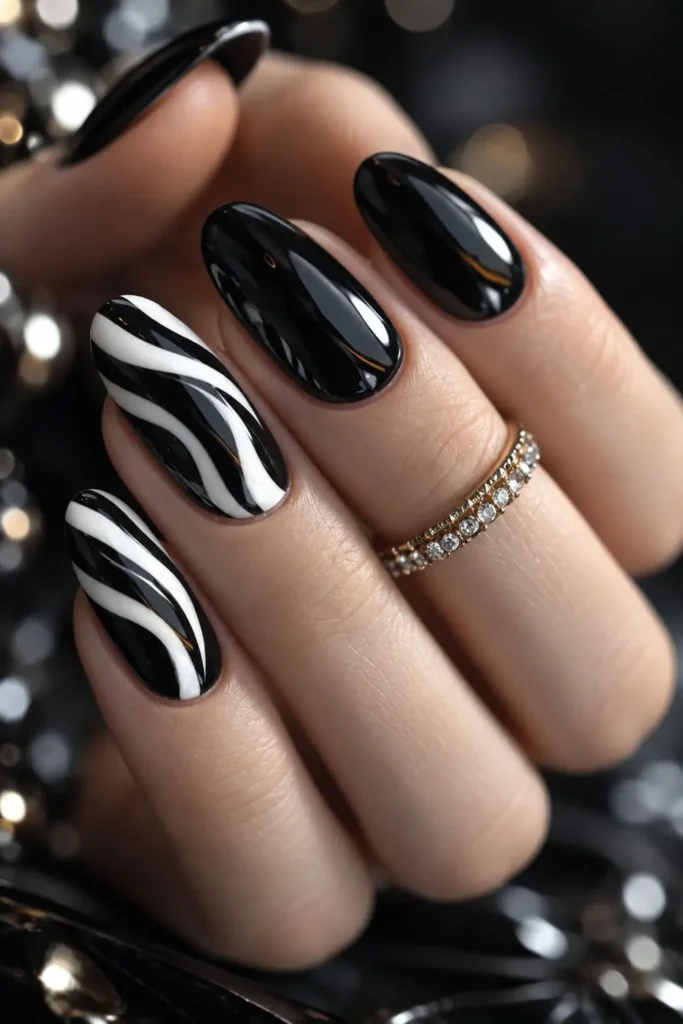
Extra length does not need extra decoration. On long acrylic nails, I favor a solid black base with intricate white line art reserved for two fingers. The larger surface area gives each stroke breathing room, helping black and white nail designs look deliberate rather than crowded.
Let nail shape guide placement. With coffin tips, keep detailed line art inside the tapered edges; on almond shaped nails, curve a French tip along the silhouette. Both acrylic extensions and longer natural nails offer a generous design canvas, but the composition still needs clear margins.
For design variation, place dotting near the cuticle and leave the upper portion quieter. If you prefer multi-element patterns, use one dominant motif and smaller supporting marks. This creates visual depth without letting complex geometric combinations compete across every finger in the set.
9. Checkered Black and White Nails
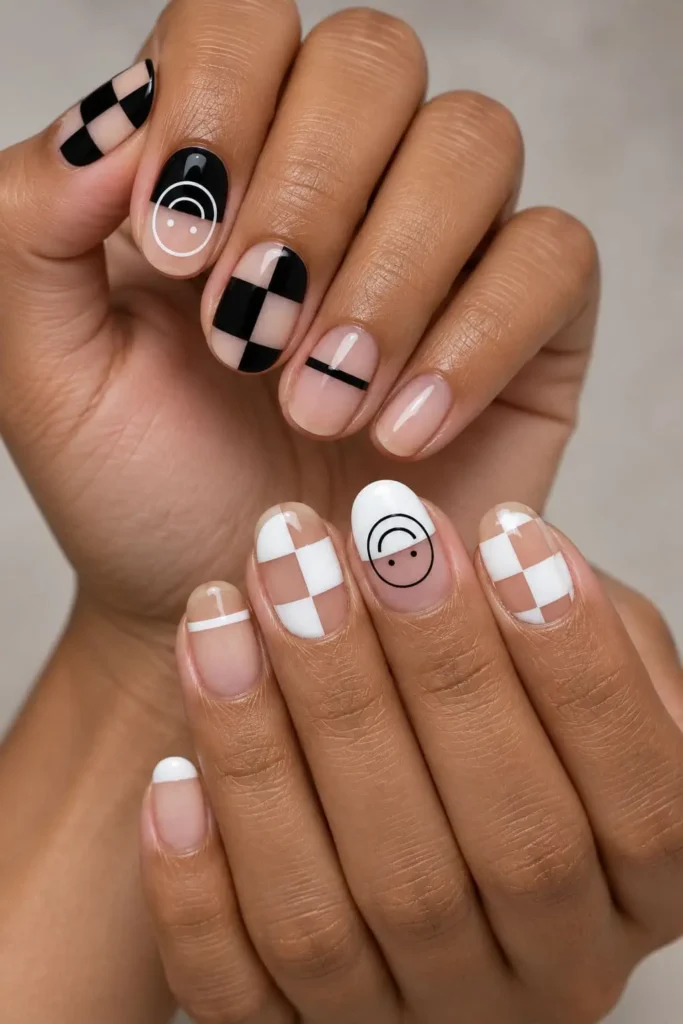
A playful pattern needs breathing room: I’d place checkered nails beside solid black accents for a modern edge. Keep black and white squares slightly larger on short nails so the grid stays readable; that restraint makes a bold manicure feel effortlessly cool, with a retro finish.
10. Cow Print Nails
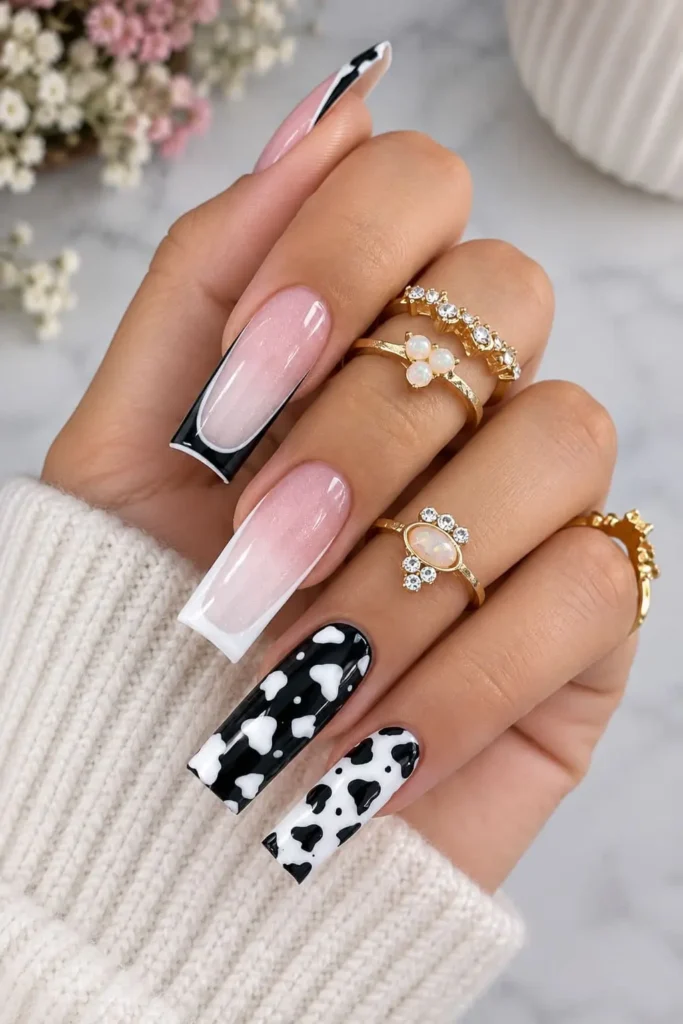
A classic French manicure by decorating the white tips with irregular black cow spots. For cow print nails with subtle coastal cowgirl vibes, leave space between patches; black and white gel polish provides contrast, while varied spot sizes keep the pattern from looking stamped.
11. Yin and Yang Nail
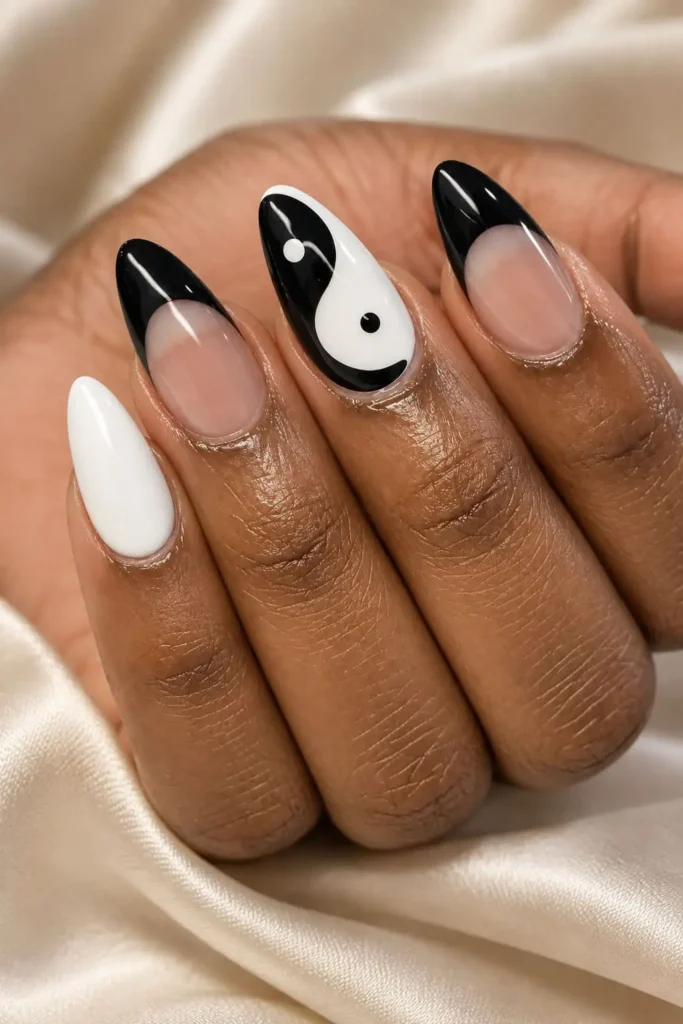
Keep yin-yang nail art on two accent nails so this high-contrast manicure has breathing room. The symbol brings opposite forces together as interconnected forces; its curved division deserves more attention than oversized dots. Place each dot inside the widest section to keep the design visually balanced.
12. Aura Nails
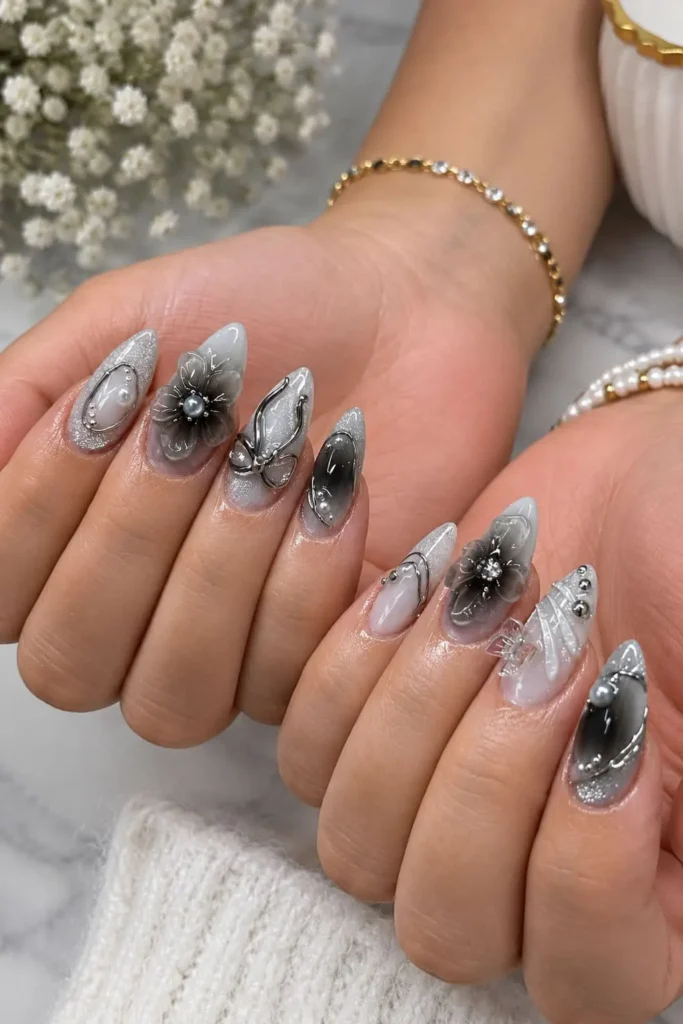
Softly diffused white centers give black aura nails their depth; keeping the glow slightly off-center adds an edgy twist. For balanced manicure designs, repeat the haze across the set, then place tiny metallic charms near one cuticle so the hardware leaves the gradient visible. For more color combinations using this same glowing technique, see our aura nails designs guide.
13. Snakeskin Black and White Nail Design
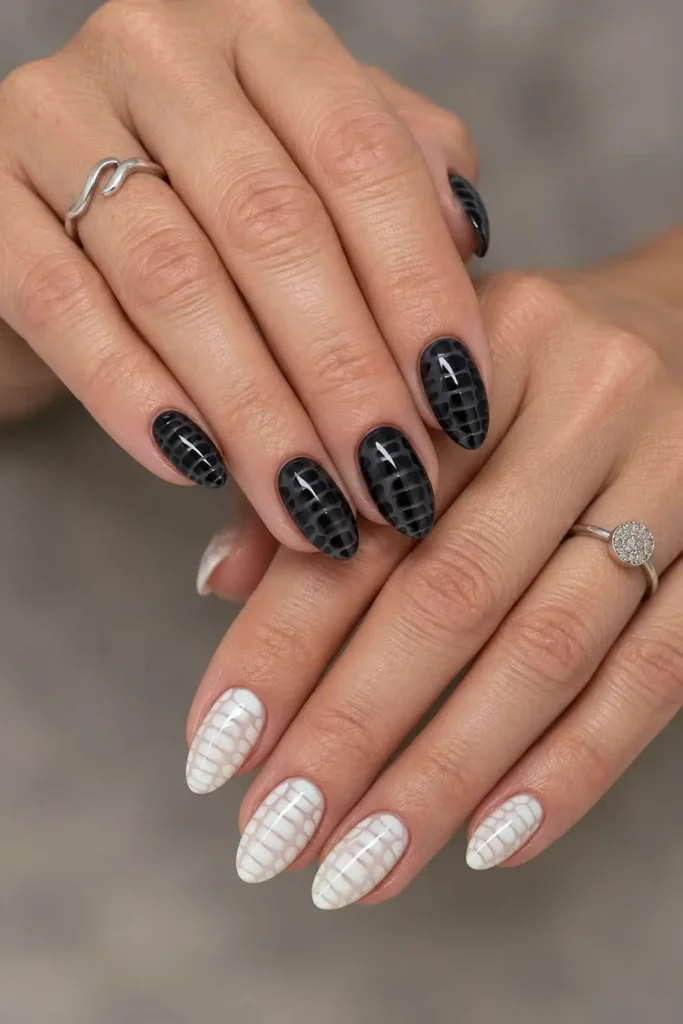
Black and white snakeskin needs breathing room between scales; overcrowding blurs the pattern. Among the neutrals circulating in the nail world, this high-reward finish stands out through contrast. For simple application, use a snakeskin stamp; reserve blooming gel for softer, less predictable edges on an accent nail.
14. Florals Black and White Nails
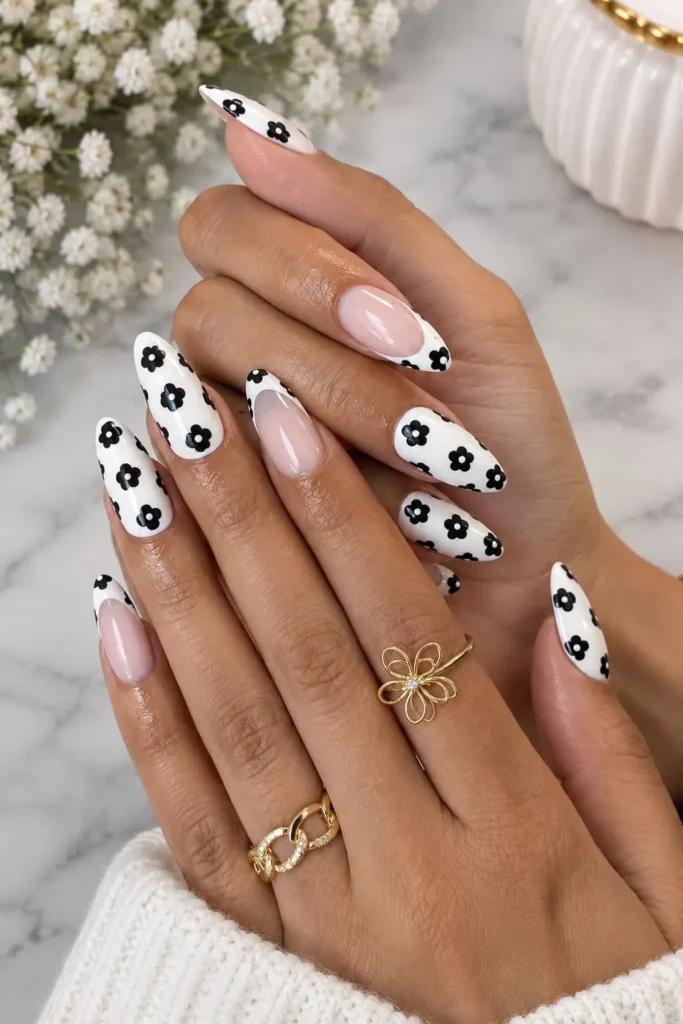
I prefer tiny black florals clustered near one sidewall, leaving the center open for a simple finish. A white base keeps the petals crisp and the mood girly. For a fun variation, experiment with colors on a practice tip first, then translate your favorite arrangement back into monochrome.
What nail shapes work best for black and white nail designs?
Start with the pattern, then choose the outline: square nails give graphic designs a crisp frame, while their flat edges reinforce the angular quality of geometric designs. For detailed artwork, longer coffin shapes offer extra design room, especially when several elements need clear separation. For swirls and marble, almond nails echo the movement through an elongated shape and curved tip. That rounded outline softens the contrast between black and white. Not sure how these patterns look on your shape? See our almond nail designs roundup for more shape-specific inspiration. Meanwhile, oval shapes also suit organic designs, particularly when a shorter length calls for flowing details without crowding the nail.
Are black and white nails appropriate for professional settings?
Yes, black and white nails can suit professional contexts, but restraint matters more than the two-color palette itself. I’d choose a single black line over negative space for a deliberate, polished effect. That keeps the contrast visible without making every nail compete for attention during a meeting. For conservative offices, I’d start with minimalist styles: a small dot accent makes design selection straightforward. Keep nails tidy and polish free of chips, especially for interviews. Before choosing bolder patterns, check your workplace’s dress expectations; nail color alone cannot tell you whether a manicure fits.
How do I make black and white nails look less stark?
Start with a warm white base: its warmth narrows the contrast gap more gently than bright optical white. Keep the monochrome effect, but replace hard-edged blocks with a fine abstract swirl to soften the contrast. For Dalmatian spots, leave more base showing between smaller marks; crowded patterns can feel heavier. Give marble veining organic edges and room to wander, creating visual flow without the rigid divisions associated with geometric edges.
Can I mix black and white designs with another accent color?
Yes, black and white designs can accommodate a red accent or gold accent nail without losing monochrome coherence. Keep one accent nail maximum per set, using color sparingly. A graphic, retro detail adds interest; repeating red throughout the palette can push the look into holiday territory.
How long do black and white press-on nails last?
Black and white press-ons can last up to two weeks with nail glue; adhesive tabs suit shorter wear, with some rated up to five days. I’d treat 2 to 3 weeks as product-dependent, never guaranteed: the attachment method matters more than the color or pattern. For longer wear, proper prep starts with clean, dry nails and no oils at the cuticle before application. A useful distinction: graphic designs painted on top can chip independently of the adhesive bond, so crisp black edges do not necessarily mean the attachment remains secure.
Is there a difference between matte and glossy finishes for black and white nails?
Choosing both finishes within one manicure changes the tone of the design without adding another color. Matte black on white keeps minimalist line designs crisp without glare, while glossy black on white introduces shine and a sleek appearance. Matte white on black can suggest a chalky quality, especially across larger painted areas. For minimalist line designs, try glossy details over a matte base; applying one finish across everything removes the contrast between reflective and nonreflective sections.